Microsoft Messaging - Windows Mobile 6 - Setup Guide
Important Points
- First you need to make sure the email address(es) you will be sending from have been authorised for your account in our Control Panel .
- These instructions assume your email server / account has already been setup and is collecting email correctly.
- Take a note of any settings you change.
- Only change the items specified - you should not need to change your incoming email settings.
- These instructions are only for Windows Messaging on Windows Mobile 6 -for other email programs please see How To Setup AuthSMTP or contact us.
- Windows Messaging appears to try to use SSL connections even if you tell it not to use them - for this reason we recommend you enable SSL connections for your AuthSMTP account in the Control Panel first.
Step 1
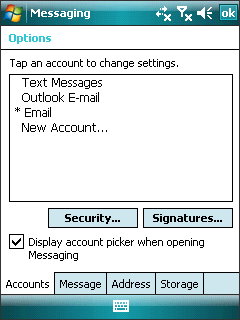
- Load Messaging on your device - click 'Menu' and select 'Options' - it should look something like this:
Step 2
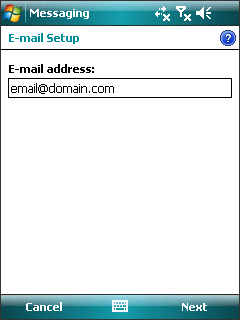
- Click on your email account and it should look something like this:
Step 3
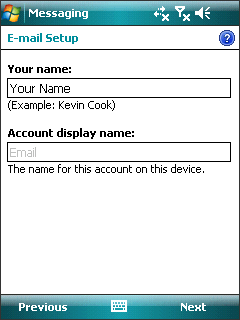
- No changes should be needed so click 'Next' then it should look something like this:
Step 4
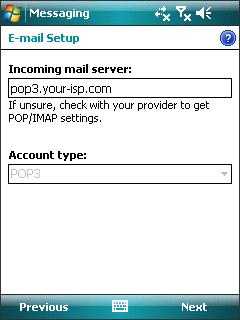
- No changes should be needed - so click 'Next' then it should look something like this:
Step 5
- No changes should be needed - so click 'Next' then it should look something like this:
Step 6
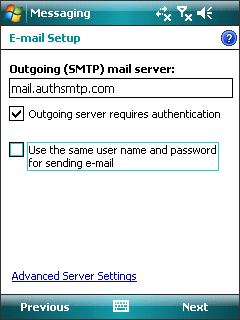
- Enter the SMTP server we provided in the signup instructions (usually:mail.authsmtp.com) and tick 'Outgoing server requires authentication'.
- Click 'Advanced Server Settings' and should look something like this:
Step 7
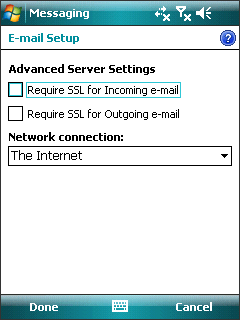
- Uncheck 'Require SSL for Outgoing e-mail' although see the note above'SSL connections' in the box at the top of this page - then click 'Done' to be taken back to the previous page:

Step 8
- Click 'Next' then it should look something like this.
Step 9
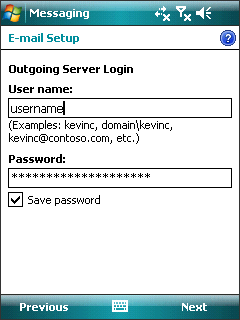
- Enter your AuthSMTP username (typically something like: aa12345) and AuthSMTP password - both are case sensitive and click to 'Save Password'then click 'Next':
Step 10
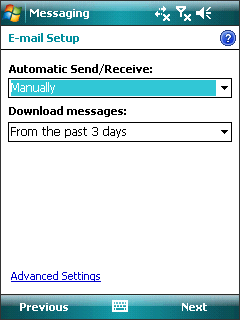
- No changes are usually required to this section for setting up outgoing mail - click'Next'.
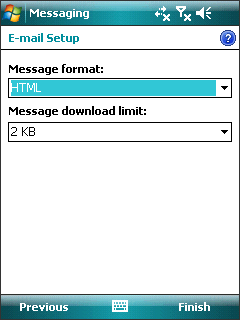
Step 11
- No changes are usually required to this section for setting up outgoing mail - click'Finish'
- Done!
