Microsoft Outlook 2016 - Default Port - Setup Guide
IMPORTANT NOTE
A recent update from Microsoft has changed how you access the user account settings in Outlook 2016.
If the guide below does not match what you see in your copy of Outlook 2016, please take the following steps:
- Click on the Windows Start button in the bottom left of your screen so that the menu pops up
- Type 'C' and it will auto-suggest apps that begin with the letter 'C'
- Click on 'Control Panel'
- Click on 'User Accounts'
- Click on 'Mail (Microsoft Outlook 2016)'
- In the pop-up window, click the 'Email Accounts...' button
- You will then see the original 'Account Settings' window
You can then continue from Step 4 of this setup guide.
Important Points
- First you need to make sure the address(es) you will be sending from have been authorised on your account in our Control Panel
- These instructions assume your email account has already been setup and is collecting email correctly.
- Take a note of any settings you change
- Only change the items specified - you should not need to change your incoming settings
- These instructions are only for Microsoft Outlook 2016 - for other email programs please see How To Setup AuthSMTP
- We have instructions for both default SMTP port and alternate SMTP port configurations - alternate port is generally used if your ISP blocks the normal port 25 SMTP access (as many do these days!)
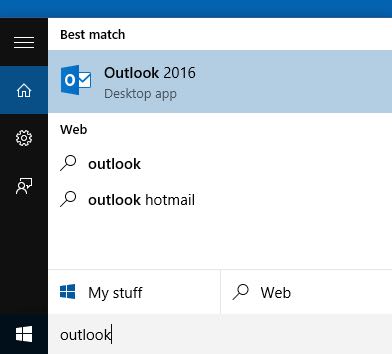
Step One
- To open Outlook 2016 click in the search bar in the bottom left-hand corner of your screen, type 'outlook' and then click on the program when it is displayed
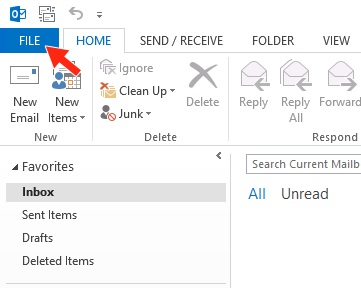
Step Two
- Go to the 'File' tab
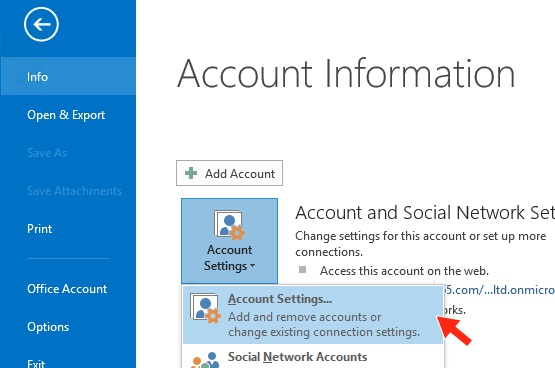
Step Three
- Go to 'Info' in the left-hand column
- Click on 'Account Settings'
- Click the drop-down button titled 'Account Settings...'
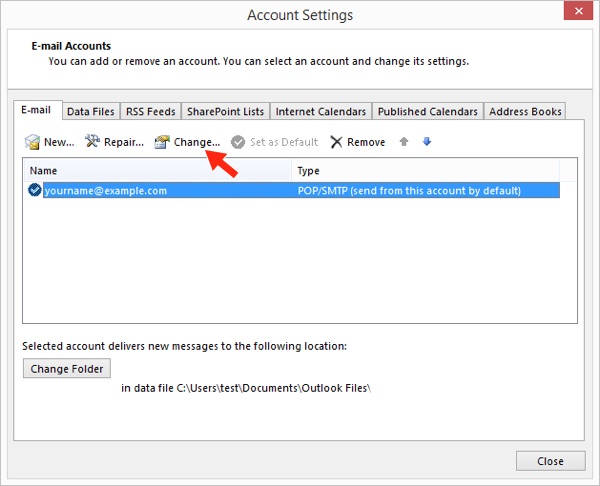
Step Four
- Select your email account from the list
- Click the 'Change...' button
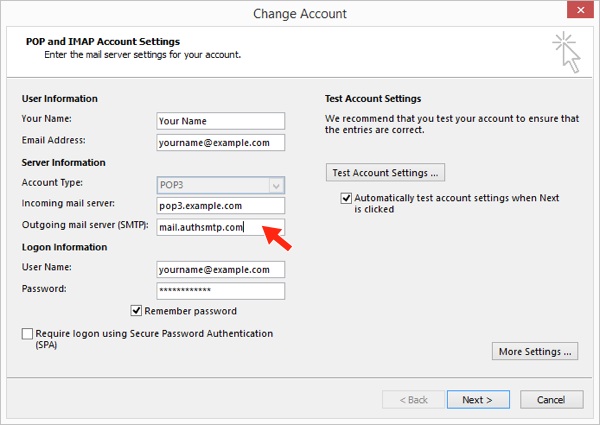
Step Five
- Change the 'Outgoing mail server (SMTP)' to the SMTP server we supplied with your signup email, this is typically 'mail.authsmtp.com'
- Click the 'More Settings...' button
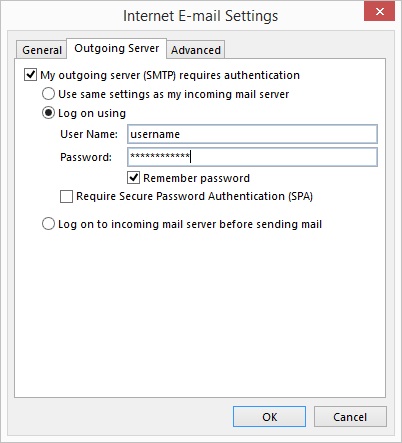
Step Six
- Select the 'Outgoing Server' tab
- Tick 'My outgoing server (SMTP) requires authentication'
- Select 'Log on using'
- Enter the AuthSMTP username and password we supplied when you signed up
- Tick the 'Remember password' option
- Click 'OK'
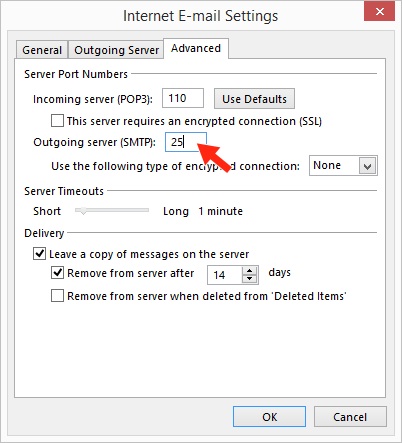
Step Seven
- Select the 'Advanced' tab
- Ensure the 'Outgoing server (SMTP)' port field is set to '25' which is the default SMTP port
- Click 'OK'
Step Eight
- Click the 'Next >' button
- In the next window click 'Finish'
- In the 'Account Settings' window click 'Close'
Step Nine
- You should now be back to the main Outlook 2016 screen
- Close Outlook 2016 and then reload
- Check you are online then test to ensure you can send mail correctly
- All done!